How to Build a Wicking Bed for your Kitchen Garden

Today’s story begins with a starry-eyed, 23-year-old Casey who decided she wanted to fill her backyard with fruiting trees. She was young, she had dreams and leafy aspirations and, well, she planted 27 trees and now (8 years later) has a lush and edible backyard… that also happens to be mostly too shady for vegetables.
Whoops.
I don’t really regret it. Actually, I don’t regret a single thing! The trees I have filled my backyard with provide me with lemons, limes, mulberries, curry leaves, mangoes, elderflowers, bananas, bay leaves, apples, pecans, papayas, and hopefully one day figs, blood oranges, Tamarillos, peaches and nectarines. I love them. They’ve brought birds to the garden, they help cool the entire space, provide shade (which helps protect the soil and the micro-organisms that live in it) and make the garden feel private, secluded and wild.
So trees: definitely good. Plant one today! Hell, plant 27!
The only thing is, over the last 2 or so years it has become increasingly difficult to find enough sunny space for my veggies. This is partly my fault for relentlessly planting new and interesting flowering shrubs (echiums, buddlejas, roses, salvias, daisies, native hibiscus, verbena bonariensis, ribbon bush and mandevillas to name a few - you should absolutely try them all!), but it also boils down to the fact that there just aren’t as many spots in the garden that receive full sunlight for 6-8 hours a day. This is the kind of sunlight that most fruiting vegetables really need to thrive - without it they tend to grow leggy, spindly and weak. They flower less, fruit less and are more susceptible to bugs and fungal infections.
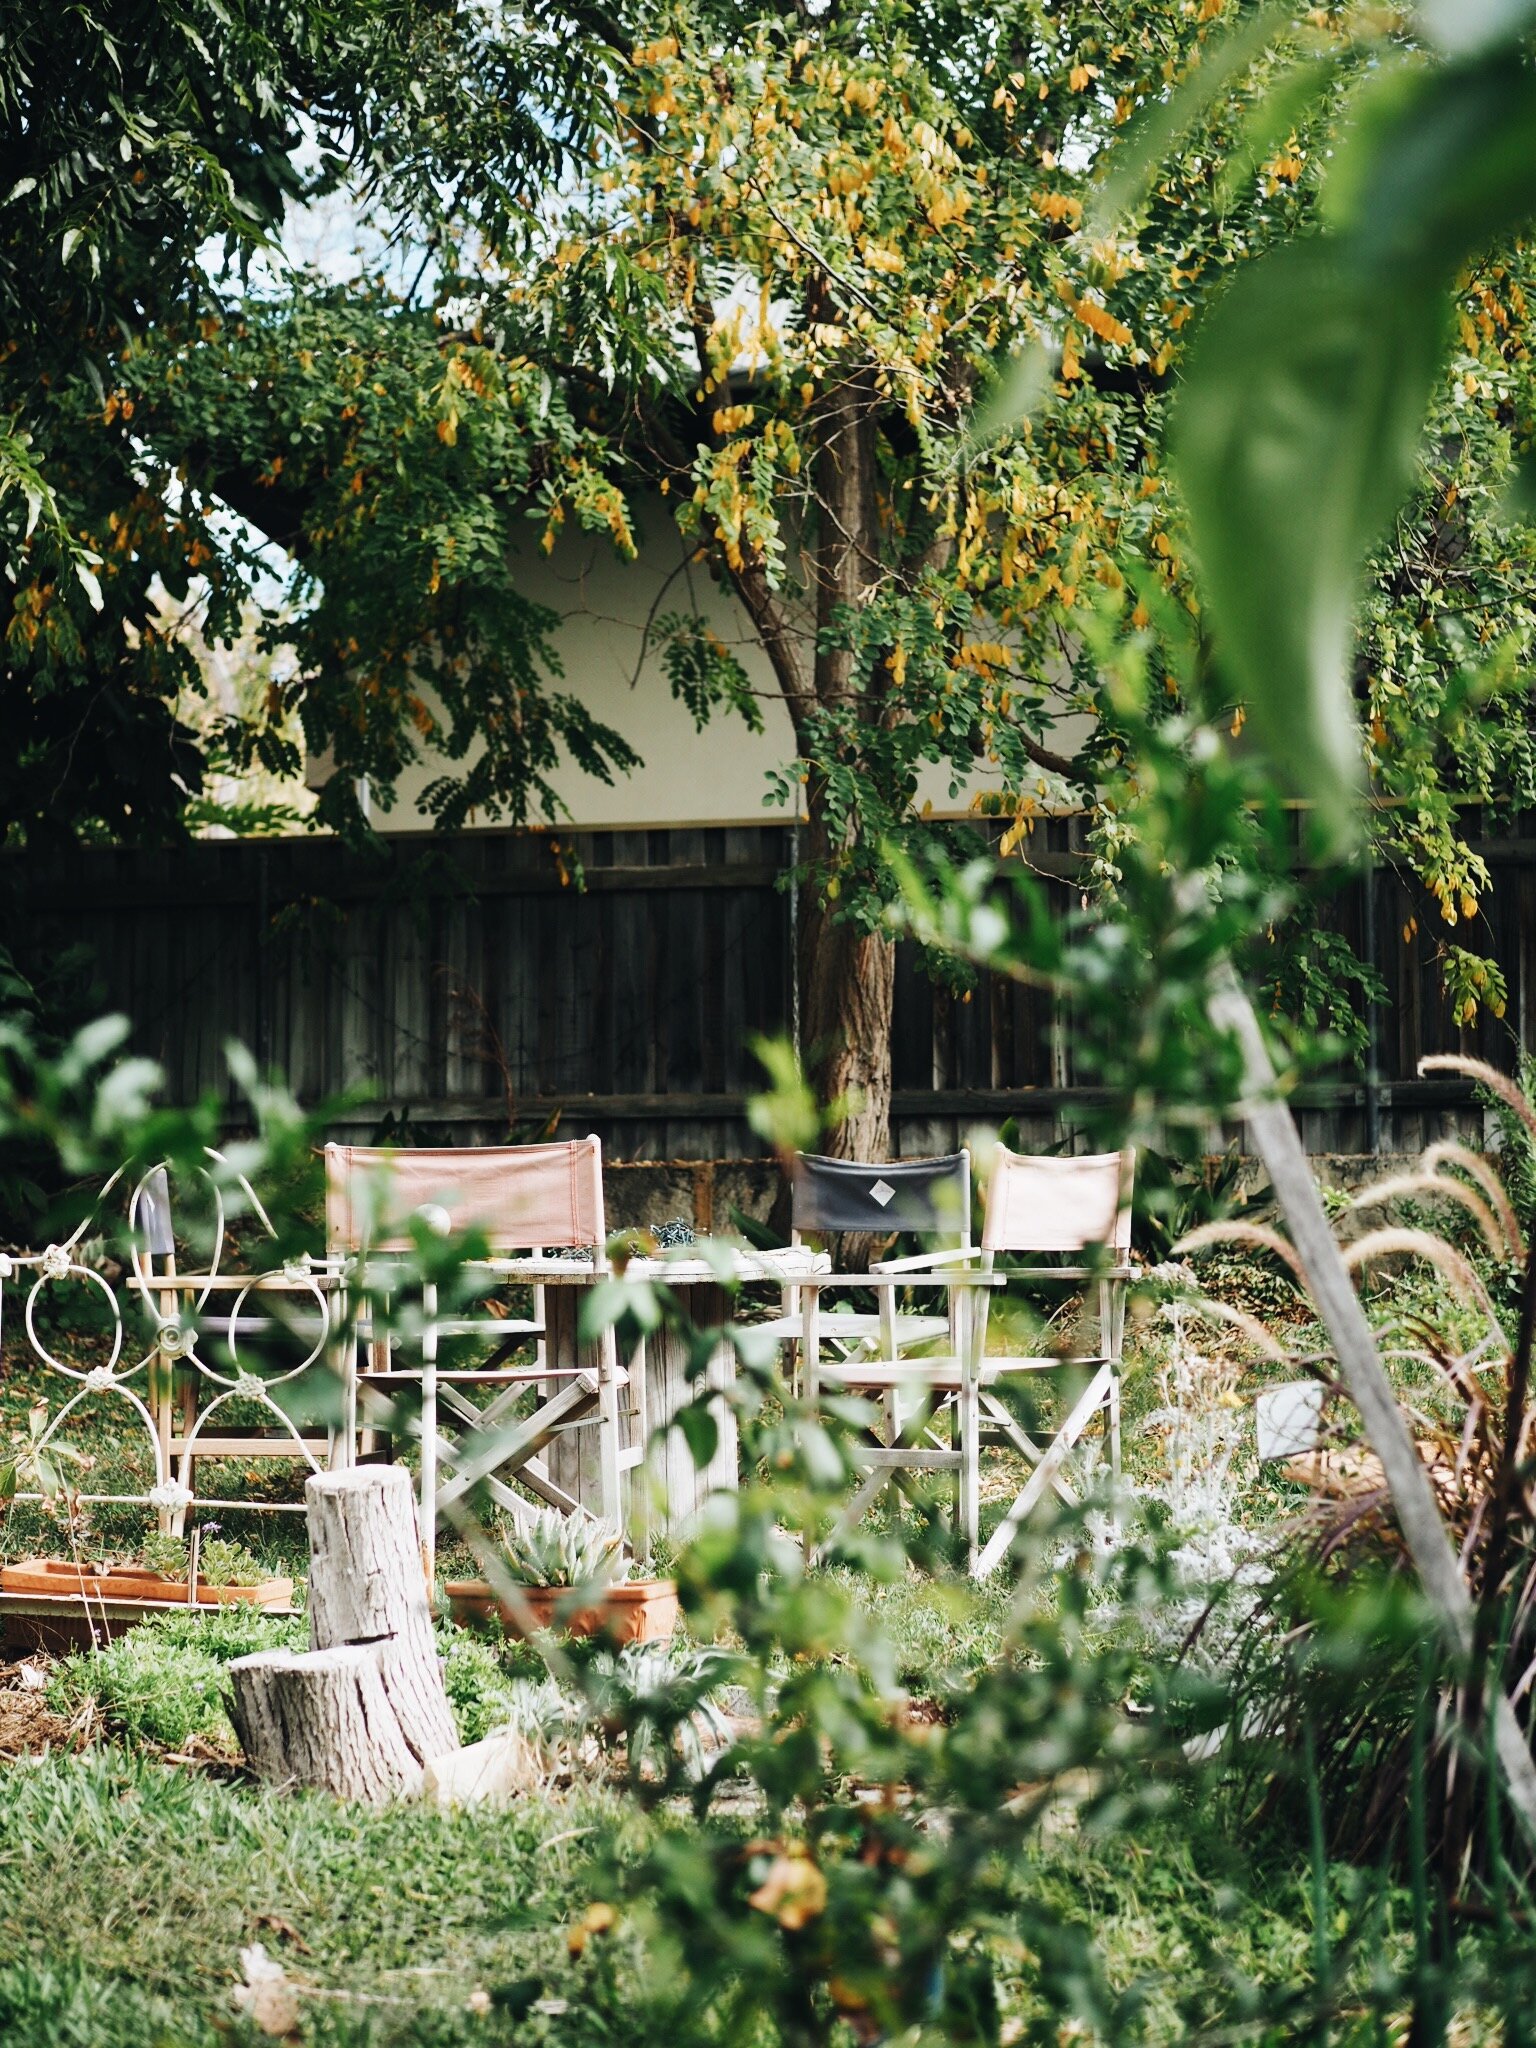
Fortunately for me, due to a combination of laziness and improper reticulation, our front garden has been largely left alone over the last 8 years. I planted a line of citrus along the fence - mandarins, a pink grapefruit, a kaffir lime (also known as a makrut lime, Thai lime or Mauritius papeda!), a Tahitian lime and an orange tree (in fact, I just harvested my first oranges this week! They didn’t even make it inside - I peeled them with my teeth and ate them in one go! Such are the pleasures of edible gardening), and have mostly filled the rest up with hardy cottage-garden plants (daisies, sea lavender, scented pelargoniums, perennial basil, artemisia, alyssum, fennel and borage - if you have a sunny, relatively dry garden that you want to make overflow with cottage blooms, try those). Oo almost forgot I also have a custard apple tree and a Black Sapote chocolate pudding tree.
Anyhoo, despite what I’m now realising still sounds like quite a lot of trees, the front garden is mercifully full of sunshine and so is destined to become the location for my new and improved kitchen garden. And this time I’m gonna do it right. So right, in fact, that in addition to building a whole new raised bed section entirely for veggies, I’ve just decided this very morning to turn my raised kitchen garden bed into a wicking bed!

What is a wicking bed?
I’m going to be honest, I have ‘known of’ wicking beds for a few years but never actually bothered to put a lot of effort into researching them, and I’ve certainly never made one. I have to admit that, generally, if I come across a garden project that involves phrases like ‘fluid conveyance pipes’, ‘intermediate bulk containers’, ‘capillary action’, ‘pond liner’ and ‘polystyrene’, I’ll probably throw it in the ‘too hard’ basket, claim to be a fan of ‘simple’, ‘traditional’ and ‘organic’ processes and just go make friends with a bee.
Not today, friends. Today I want to introduce you to a new Casey. This is a Casey who has seed drawers that are all individually labelled(!!!). This is a Casey who has planted 11 varieties of tomato seeds (all also labelled thank you very much), and a Casey who is determined to nail this ‘organised gardening’ thing once and for all!
Failing that, I am - at least - a Casey who is going to write an extended blog post about all her good intentions. But I’m getting distracted. What is a wicking bed?
A wicking bed is basically a raised garden bed that waters itself from the bottom, rather from the top. It’s watered by a pipe that curls around the bottom of the bed with plenty of holes in it so that water can run out. This pipe goes all the way up and out the top of the bed, where there is an opening so you can top it up with more water as needed:
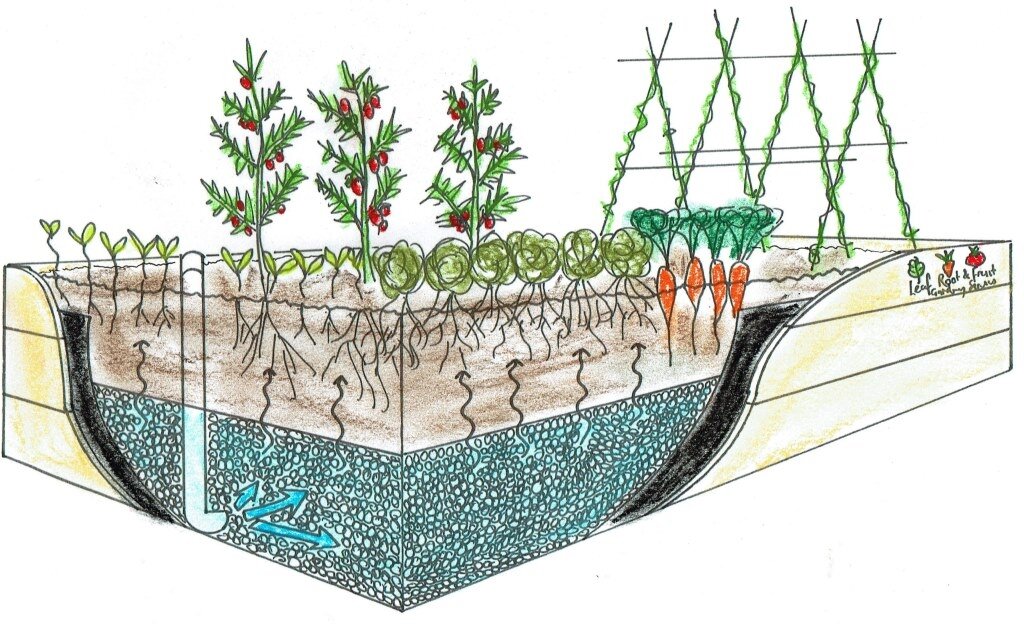
Image from Leaf, Root & Fruit Gardening Services, available at: https://www.leafrootfruit.com.au/gardens/wicking-beds/
This water collects in a reservoir at the bottom that is filled with gravel. In between the gravel layer and the soil layer is a bit of fine-meshed fabric (like shade cloth), which stops the soil filtering down into the gravel. The water that collects in the bottom of the bed is drawn upwards through the soil via the ‘capillary action’ that (until recently) so intimidated me.

Why are wicking beds useful?
Wicking beds provide a few advantages over regular raised beds (especially in very hot, dry climates where it’s difficult to keep your soil consistently moist over summer).
For one, wicking beds require less frequent watering - you build them in such a way that the water collects in a reservoir at the bottom of the bed to be drawn up as the soil above it dries. This is massively helpful in our dry Australian summers where it can be totally exhausting to have to hand water our veggies to keep them alive in the midday heat.
For another, having the water source coming from below the plants (rather than above them) helps encourage the plants to establish deeper root systems. This leads to sturdier and more resilient plants that wilt less easily as the weather heats up.
The good thing is, despite my initial reservations, I don’t actually think wicking beds are that hard to build. You don’t ACTUALLY need intermediate bulk containers or polystyrene, the soil takes care of the capillary action for you, and I’m pretttttty sure ‘fluid conveyance pipes’ is just a fancy way of saying ‘a big pipe that water can pour through. Which is basically all pipes (apart from the ancient pipes in our shower that helpfully fill with tree roots seemingly every 6 months).
So I’ve decided it’s gonna be easy. I’ve read the websites, I’ve watched the Gardening Australia videos, I’ve drunk the Kool-aid. I am going to give this a shot myself.
If you’d like to try building a wicking bed too read on to learn how.

Get yourself a raised garden bed
First thing’s first, you’re going to need a raised bed. This can be anything really - we’re going to build ours out of heavy planks of wood, but you can build a wicking bed in a bathtub, in a corrugated metal bed, or even - should you wish - in an intermediate bulk container. The main thing is that the bed needs to be able to hold water (so if you build one out of wood it will need to be lined), and you need to be able to drill a hole in it near the bottom so you can attach a tap to let out excess water in the case of overflow.
Get all your pipes and stuff
I have intentionally used the phrase ‘pipes and stuff’ to help protect you from the kind of intimidated overwhelm that has thus far prevented me from creating a wicking bed. Also don’t you kind of think even the word ‘wicking bed’ is slightly intimidating? I’d prefer they were called ‘super-easy-pipe-filled-self-watering-beds’ or similar. Feels much more approachable (although probably don’t ask for ‘pipes and stuff’ at your local Bunnings Warehouse or other garden landscaping conglomerate - I’ll help you with that in two tics).
So pipes and stuff.
You need a Big Straight Pipe that can poke out the top of the container - this is your inlet pipe (where you’ll add the water).
You need a Bendy Pipe that will attach to the Big Straight Pipe (if you can’t find one that securely attaches you can also just use one that has a slightly wider diameter than the Big Straight Pipe, so that the Big Straight Pipe can fit comfortably inside it). Pick a Bendy Pipe that either already has holes in it or that can be drilled into.
You need an Overflow Pipe so that excess water can pour out - irrigation fittings (aka ‘poly joiners’) work for this - have a look at the Gardening Australia video below to get an idea of how (and where) to fit the overflow pipe.
Now, enough of all this Big Pipe Bendy Pipe business. We’ve established that wicking beds aren’t really that hard, we’re big, strong, grown up men and women and we can drill holes into things and connect pipes together. It’s basically lego. I’m sorry if you are already totally confident about this process, is it blatantly obvious that this blog post is actually a personal rallying cry written entirely for myself?
Ingredients for your wicking bed
So, to business. Here’s what you - officially - need:
A raised bed 600mm high or higher (I’m making mine ~1.2m high so it’s around waist height, this means I’ll need more gravel to fill it as you don’t want more than about 250-300mm of soil above the gravel or the bed won’t wick properly).
Pond liner (to line the bed and capture the water - get stuff that is very tough and isn’t at risk of being punctured by the gravel - you want to make sure there is absolutely no chance of holes forming in this pond liner or the wicking bed is kaput!)
Geotextile fabric (basically fabric that will allow water to pass through but will stop the soil sinking into the gravel)
50mm diameter PVC pipe (for your inlet) - make it about 100mm longer than the height of your raised bed
50mm diameter agricultural pipe (bendy pipe that already has holes in it)
50mm PVC elbow (to connect the PVC pipe to the bendy pipe er…the agricultural pipe)
50mm end cap (which acts like a lid for the PVC inlet pipe - stops mosquitos getting into)
19mm poly joiner (this is used to make an overflow tap) - you puncture a tiny hole in the pond liner and drill a 20mm hole in the side of your container, then you insert the poly joiner through this hole. You can also add a tap fitting to this hole to control when the container drains - watch Sophie’s video (above) to see how she’s done it.
Gravel or ‘scoria’ - enough to fill your container all the way up to just under ~300mm below the top (the top 250-300mm will be filled with soil)
Good quality soil to fill the top 250-300mm of the container, plus some good quality compost to add nutrients to the soil (bonus points if you use your own!)
Lupin mulch or pea straw to add as a top layer above the soil (this helps improve moisture retention too)
It seems wicking beds are very ‘in’ right now because Bunnings has a list of all the bits and pieces you’ll need to build one. If you’d like to check it out you can get it here.

Planting your wicking bed
Now the fun part! You can obviously put whatever you want in your wicking bed, but I am going to plant mine exclusively with vegetables because I want to to be a real kitchen garden that I can go to every time I want to harvest my dinner.
While we’re on the subject, if you’d like to grow more of your own food but haven’t found the time and motivation (or are totally swamped by all the information online) I have a solution!
It’s my online gardening membership called Seed to Supper.
Seed to Supper is designed to make growing your own food really straight forward and fun! Every month I guide you through planting four new veggies, looking after your garden and harvesting your produce. Then at the end of the month I send you a collection of plant-based recipes that are tailored to what you’re harvesting from your garden!
Unlike other online gardening courses, in Seed to Supper I’m there, in person, to help you every week with tips, guides and encouragement, as well as a wonderful online community forum where you can ask question and meet other growers.
My goal is to help make the process of growing your own food way less overwhelming and a lot more enjoyable, community-focused and tasty!
Click the button below if you’d like to learn more…
Now, where were we?
So the reason I want to focus on growing veggies in my wicking bed is that veggies tend to require the best, most nutrient dense soil and plenty of water - they’re needy buggers. So they’re the perfect candidates for a wicking bed. This summer I plan to grow:
rockmelon (zatta)
zucchinis (grey lebanese)
tomato (san marzano)
basil (sweet)
squash (golden scallopini)
silverbeet (fordhook)
kale (tuscan)
watermelon (sugarbaby)
shallots (long red florence)
kale (curly)
beetroot (burpee's golden), and
broccoli (romanesco)
(all of which, incidentally, are in the Seed to Supper program!) 😉

Final tips
It’s important to remember that it will take a little bit of time for your wicking bed to start…wicking. So don’t just build the bed, add your plants, pour water into the inlet pipe and leave it alone. For the first 2-3 weeks you’ll want to water it as you’d water any other garden bed, giving the plants time to establish themselves and the fancy capillary action to get going.
After that point, begin to taper off the extra watering and start simply filling the bed up via the inlet pipe. Check the soil every few days at the start to make sure it’s holding moisture and that the wicking is working.
Ideally, once your wicking bed is set up and functioning you should be able to go days, even a couple of weeks in between filling up the inlet pipe, giving you a garden that is actually sustainable in our arid climate!
Sooo, now that I’ve told you all how to build a wicking bed I’m going to actually go and build a wicking bed!
Wish me luck and stay tuned for photos!